Guide: Use Any HTML Template With ExpressionEngine (part 2)
Welcome to part two of this guide, where I will show you how easy it is to take any HTML/CSS template from the web and make it the basis of an ExpressionEngine site.
You won’t need to be a hard-core coder to follow along. You won’t even need to have used ExpressionEngine before, but you should have a basic understanding of HTML and CSS.
I explain everything thoroughly with lots of screenshots, which is why a pretty simple guide still got big enough to split into four parts. It is well worth it though, as you will be able to create ExpressionEngine-driven sites from any HTML/CSS template when you’re done.
And you will be able to convert existing sites to run under ExpressionEngine because the principles will be the same.
Please make sure you have completed part one before continuing.
Table of Contents
Working with ExpressionEngine templates in your editor
As we’re learning in this guide, an ExpressionEngine site is just standard HTML and CSS, with some tags to pull the dynamic content from its database.
ExpressionEngine makes all templates and template groups available on the server as regular files and folders. That means we can edit our templates directly on the server, and any changes we make will be reflected on the site when we save the file.
This is a tremendously powerful feature that we will take advantage of next.
Setting Up Visual Studio Code
Let us set up Visual Studio Code by installing a couple of extensions. These will make the editor even better at working with ExpressionEngine templates and code.
Note: If you’re choosing another editor than Visual Studio Code, that is totally fine. The extensions described below are also available for many other editors. Or, if not the same, some with similar functionality probably are.
Download and install Visual Studio Code if you haven’t already, and then open it.
Click the Extensions icon in the sidebar or type Ctrl+Shift+X (Windows/Linux) or Cmd+Shift+X (Mac).
Search for the following two extensions, and then click their Install buttons. You can also click the links below to go to Visual Studio Code Marketplace and install from there.
ExpressionEngine from Mindpixel Labs: This extension adds syntax coloring to ExpressionEngine tags. It does a lot more than that, which you can read about via the link.
Remote SSH from Microsoft: This extension lets you connect to your server via SSH, so you can edit your remote files directly in Visual Studio Code.
This lets you edit ExpressionEngine templates, CSS files, JavaScript, and any other code on the server. Just make and save your changes, and your site is immediately updated.
Note: This extension is not needed if you run ExpressionEngine locally. Just open and edit the files directly in Visual Studio Code.
These are the extensions we need for now, but there are thousands more on VS Code Marketplace. If you need a certain function or want to customize VS Code, someone will have created an extension that does what you want.
Preparing to edit our templates in Visual Studio Code
Let us first learn where the ExpressionEngine templates are located on our server. Then we will connect to the server from Visual Studio Code and get to some editing.
Locating templates on the server
In a moment, you will be connecting to your web server via SSH from within Visual Studio Code.
When you do, your ExpressionEngine installation will be located in the web server’s docroot.
From docroot, the index.html template we will be editing, will be located here:
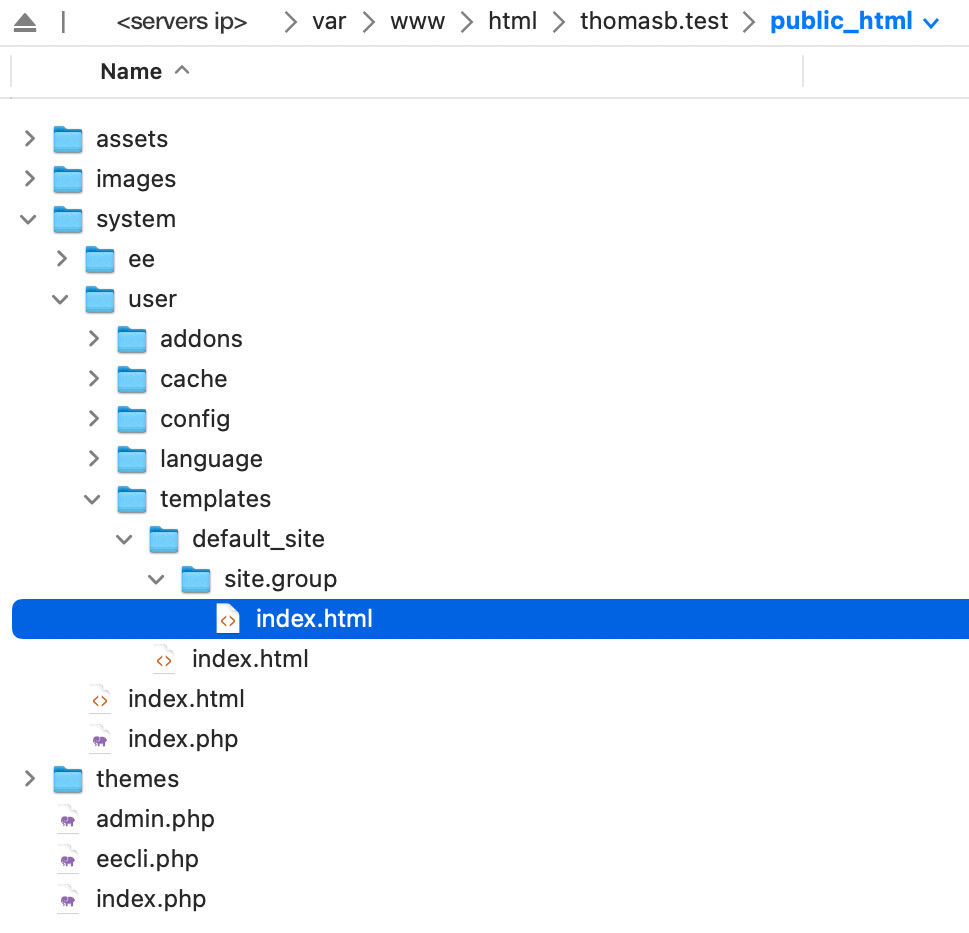
/system/user/templates/default_site/site.group/
- You can refer to the screenshot below to see where ExpressionEngine is located on my test server. The path can be different for you. But for an Apache-based web server, this is almost certainly where you will find it.
- In the screenshot, the top shows where docroot is located on my server.
- The rest of the screenshot shows where the index.html template is found inside docroot.
- Also, check this section from part 1 of this guide if you have trouble finding docroot.
As you can see, when we created the site template group, it had .group automatically appended to its name. Similarly, the index template inside site.group had .html appended. This lets ExpressionEngine keep track of what files and folders are really templates and groups.
So when creating groups and templates in the Control Panel, we just need to type the name and let ExpressionEngine handle adding the suffixes.
Connecting to a remote server via SSH in Visual Studio Code
To edit our newly created ExpressionEngine template with Visual Studio Code, we need to connect with our web server via SSH, like so:
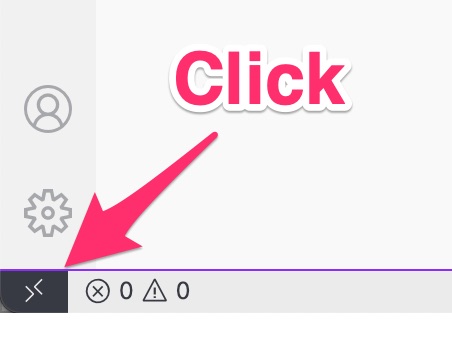
Click the black Open a Remote Window button in the lower-left corner of Visual Studio Code.
Select Connect to Host… with the down-arrow key on your keyboard and hit Enter.
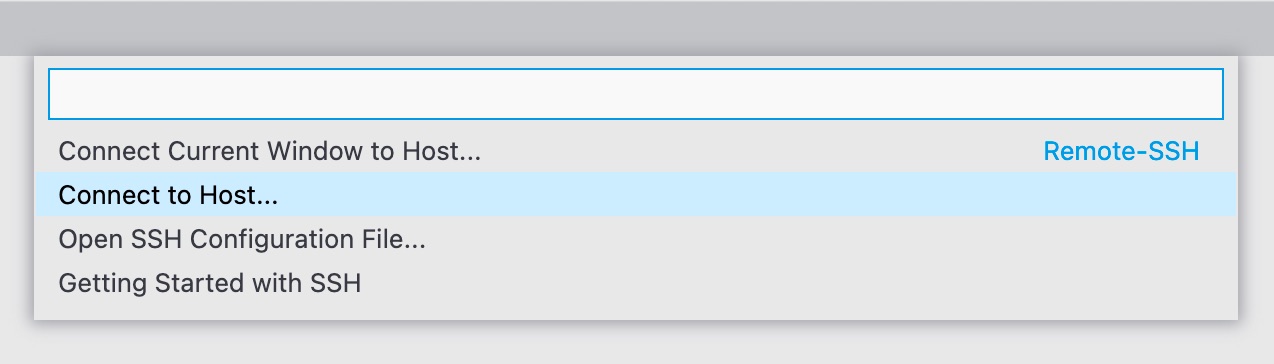
If you have connected before, your server will be ready to select.
If this is the first time connecting to your server from Visual Studio Code, select Add New SSH Host… and follow the steps according to your particular host.
As mentioned previously, SSH setup is beyond the scope of this guide, but there is plenty of help to get online.
Here are some links to the Visual Studio Code documentation that can help if you’re stuck:
→ Help page: Remote Development using SSH.
→ Help for the Connect to Host… command.
→ Help for the Add New SSH Host… command.
If you still have trouble, drop a note in the comments, and I will try to help.
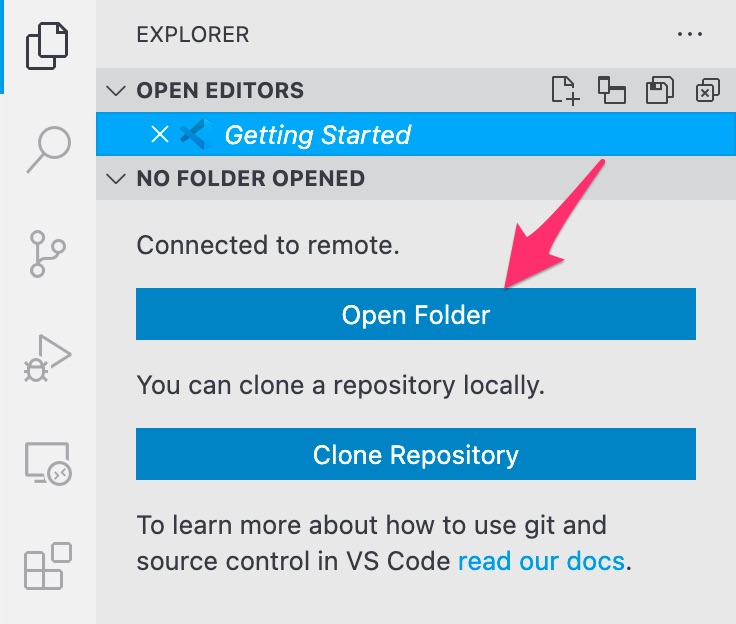
After connecting to your remote server, click Open Folder.
Visual Studio Code will now show the remote file system.
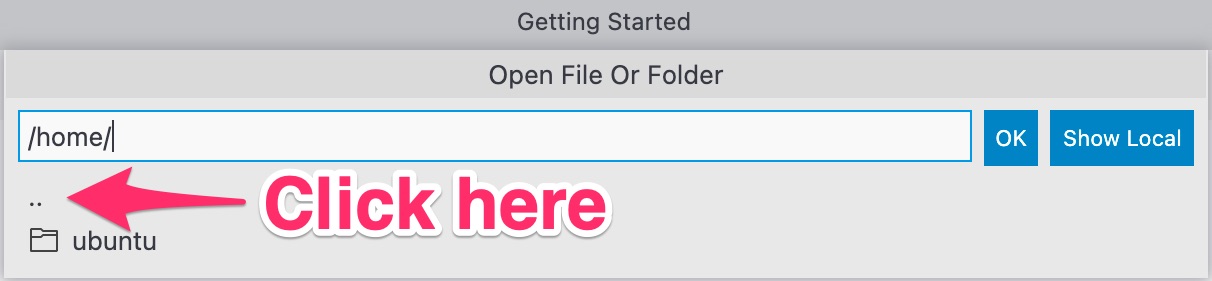
Click the button with two dots shown below to get to the root of the filesystem.
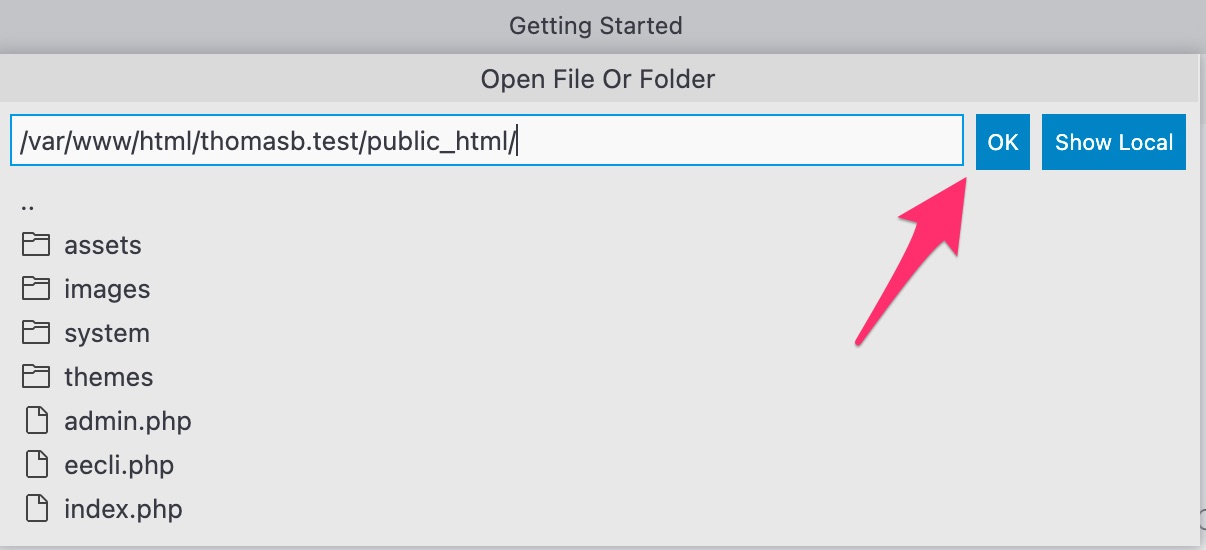
From the root, you can navigate to your web server’s docroot (where ExpressionEngine is installed) and click OK. Below is where it’s located on my test server.
You have now added your web-servers docroot to Visual Studio Code’s sidebar.
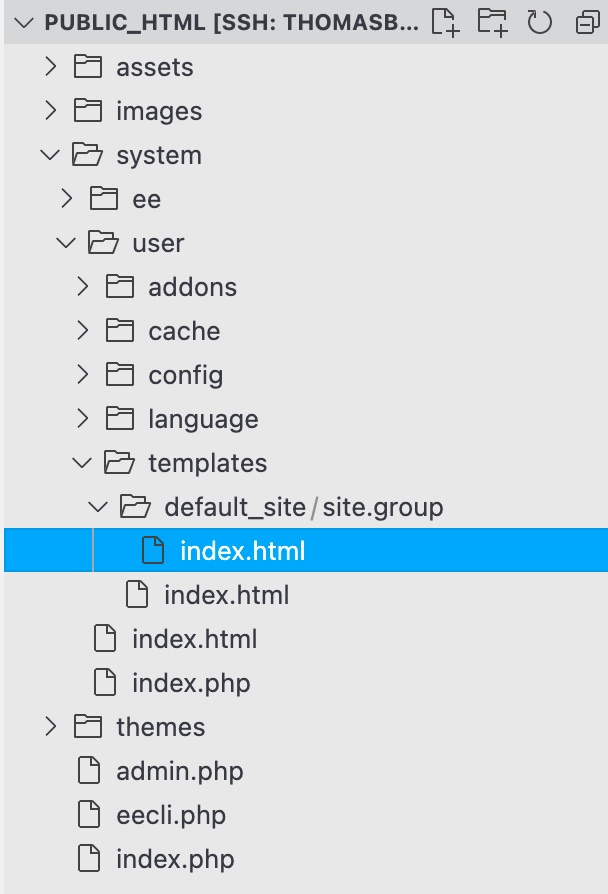
If you don’t see the sidebar hit Ctrl-Shift-E on Windows/Linux or Cmd-Shift-E on Mac to show the sidebar in Explorer view. You should now see the ExpressionEngine files as shown in the screenshot below.
In the sidebar, click on system, then user, then templates, and finally default_site / site.group. Then double-click the index.html template to open it in Visual Studio Code.
Editing index.html on the server
Well, finally, we’re ready to edit our ExpressionEngine templates in Visual Studio Code!
We will only need to change the path to the images folder on the server for this static version of our site to work. After we do that, we will make the site dynamic. Meaning when we write content and add images in ExpressionEngine, the site will show those.
Note: In the following, I will assume your site is on a remote server. If you installed ExpressionEngine locally on your machine, just open the files directly in Visual Studio Code.
Make sure you’re connected to your server in Visual Studio Code.
Open index.html inside site.group as described above.
If you take a look at the code at line 19, you’ll see this:
<a href="#" class="image avatar"><img src="images/avatar.jpg" alt="" /></a>This code assumes the images folder has not been moved. However, in part 1 of this guide, we moved images into the assets folder, so we need to change all image links to reflect this.
This is how they should look:
<a href="#" class="image avatar"><img src="assets/images/avatar.jpg" alt="" /></a>So, we need to change all occurrences of
images/toassets/images/. Luckily there is an easy way to do this in Visual Studio Code:- If you select the first instance of
images/and then hit Ctrl-D (Windows/Linux) or Cmd-D (macOS), you will also select the next one. Hit Ctrl/Cmd-D again, and the next occurrence gets selected, and so on. - If you do this twelve times, you will have selected all instances we need to change.
- Now with all instances of
images/still selected, changeimages/toassets/images/. This way, you will be editing all the image links at once.
- If you select the first instance of
And finally save the changes.
Note: There are more instances of images/ further down in index.html because the designers who made the Strata template have commented out a lot of code at the bottom of the file. These are code examples that show other features of the Strata template, like buttons, tables, social icons, form fields, and so on.
If you want to see this on your site, uncomment the code from line 120 to 435 and then follow step 4 above to change these too.
Tip: To quickly comment or uncomment code, hold down Ctrl/Cmd while hitting K and then C. This will comment or uncomment any selected code.
Seeing the site for the first time
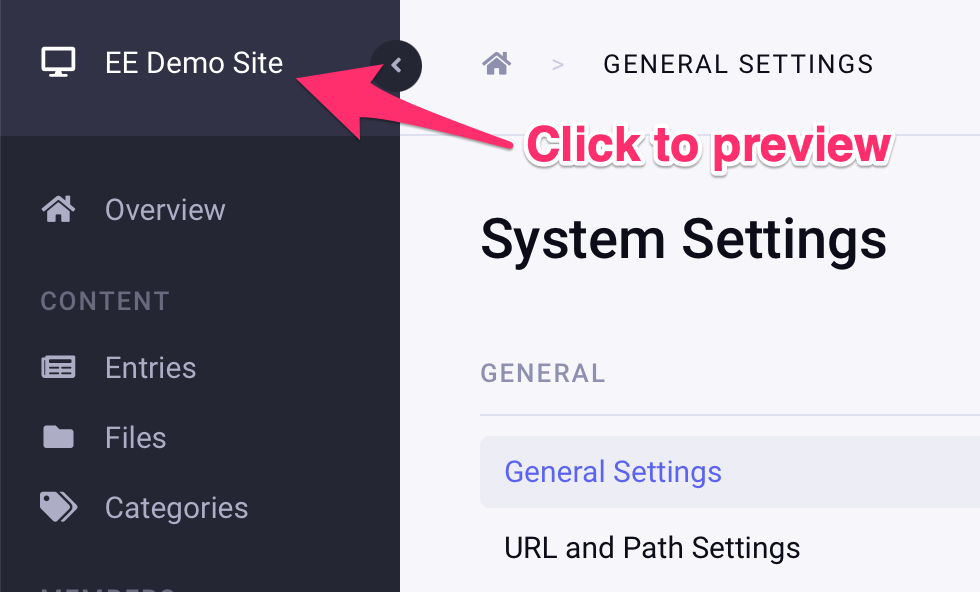
If you head back to the ExpressionEngine control panel in your browser and then click on your site name, a new tab with your site opens.
Congratulations!
We’re getting there. However, this is a static page with hard-coded text and images. And the whole point of a CMS like ExpressionEngine is to make dynamic sites.
So, let’s make ExpressionEngine display our own content instead of the hard-coded stuff.
Continue to part 3
That’s it for part two of this guide, please click here to continue with part three.
If you have any comments, corrections, or tips, please post them in the comments section of part one. We would love to hear from you!
Comments
Write a Comment:
Commenting is not available in this channel entry.